How to Install NginX on Ubuntu (Linux)
Since its release in 2004, NginX on Ubuntu has slowly but definitely grown to become one of the most popular web servers.
This rise in demand accounting for multifaceted use as not only a web server but also as a reverse proxy, load balancer, mail proxy, and HTTP cache.
Worthy of mention is the fact that through its rise, NginX has remained an open-source software available for free download.
This has perhaps accounted for it becoming one of the most used web servers.
According to Netstat, a survey of the million busiest websites showed NginX stands second to Apache with nearly 25% usage.
Features on NginX
An NginX quotes a list of features that would be too much to read in an article titled “How to install NginX”.
But, if you are going to use it, then why not know about these features? It could only help with efficient usage that would maximize user experience.
Some unique attributes that are frequently brought up by users include the ability to serve dynamic HTTP content using FastCGI, SCGI handlers for scripts, WSGI application servers
Or Phusion Passenger modules, and it can serve as a software load balancer.
To handle requests, An Nginx uses an asynchronous, event-driven approach instead of threads.
This modular architecture helps provide predictable performance under high loads.
Wikipedia lists down more features, categorizing them as below
HTTP proxy and Web server features
- Ability to handle more than 10,000 simultaneous connections with a low memory footprint (~2.5 MB per 10k inactive HTTP keep-alive connections)
- Handling of static files, index files, and auto-indexing
- Reverse proxy with caching
- Load balancing with in-band health checks
- TLS/SSL with SNI and OCSP stapling support, via OpenSSL
- FastCGI, SCGI, uWSGI support with caching
- gRPC support since March 2018, version 1.13.10.
- Name- and IP address-based virtual servers
- IPv6-compatible
- WebSockets since 1.3.13, including acting as a reverse proxy and do load balancing of WebSocket applications.
- HTTP/1.1 Upgrade (101 Switching Protocols), HTTP/2 protocol support
- URL rewriting and redirection
Mail proxy features
- TLS/SSL support
- STARTTLS support
- SMTP, POP3, and IMAP proxy
- Requires authentication using an external HTTP server or by an authentication script.
System prerequisites for installing Nginx
The Nginx requires you to have a regular, non-root user with Sudo privileges configured on your server. Once this is done, we can start with the installation.
The Installation Process
Since Nginx is available in Ubuntu’s default repositories.
It is possible to install it from these repositories using the apt packaging system.
If the apt packaging system has used before, you can update your local package index so that you have access to the most recent package listings after which we can install Nginx

Adjusting the Firewall
Before testing Nginx, the firewall software needs to adjust to allow access to the service.
An Nginx registers itself as a service with ufw upon installation, making it straightforward to allow Nginx access.
You can pull up the application configurations recognized by and compatible with ufw by running the following command

A listing of the application profiles will appear below

It appears from the list above that there are three profiles available for NginX
- The Nginx Full: This profile opens both port 80 (normal, unencrypted web traffic) and port 443 (TLS/SSL encrypted traffic)
- Nginx HTTP: This profile opens only port 80 (normal, unencrypted web traffic)
- Nginx HTTPS: This profile opens only port 443 (TLS/SSL encrypted traffic)
Since SSL hasn’t configured for our server in these instructions, we will only need to allow traffic on port 80.
Thus, recommended that you enable the most restrictive profile that will still allow the traffic you’ve configured.
Enable the selection you make by using the command:

To verify the profile change has implemented, use

This will show allowed HTTP traffic, which displays as follows
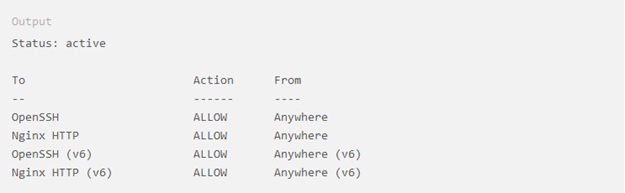
The web server should already be up and running even before you allowed HTTP traffic and adjusted the firewall. But, you can still make sure of this using the following command.

The output will display service status along with more statistics
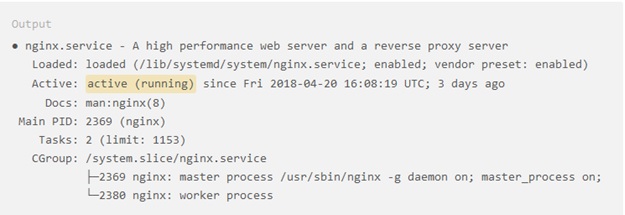
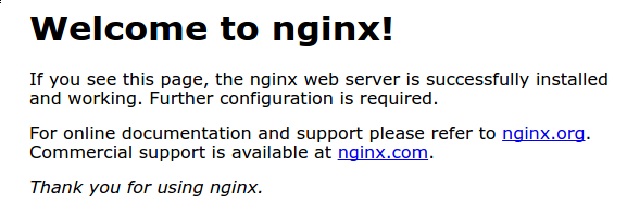
Although the service can be seen running in the display above, you can access the default Nginx landing page to confirm that the software is running properly by navigating to your web server’s IP address.
If you do not know your server’s IP address, you can get it using the server’s command prompt.
Type the server IP in the command prompt

The following NginX landing page will welcome you